-
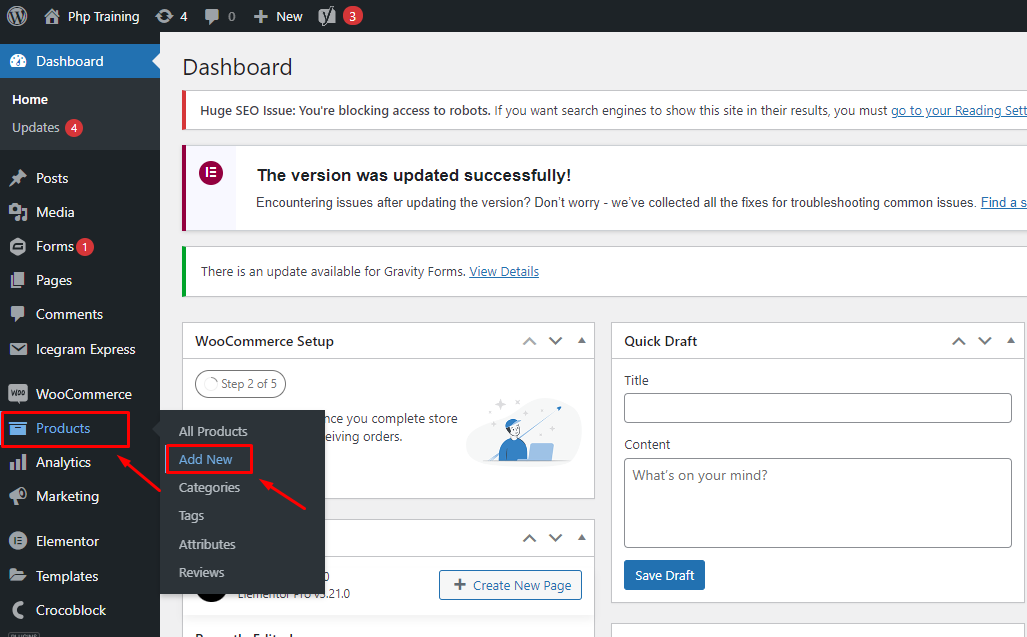
- Navigate to WooCommerce > Products > Add New.
-
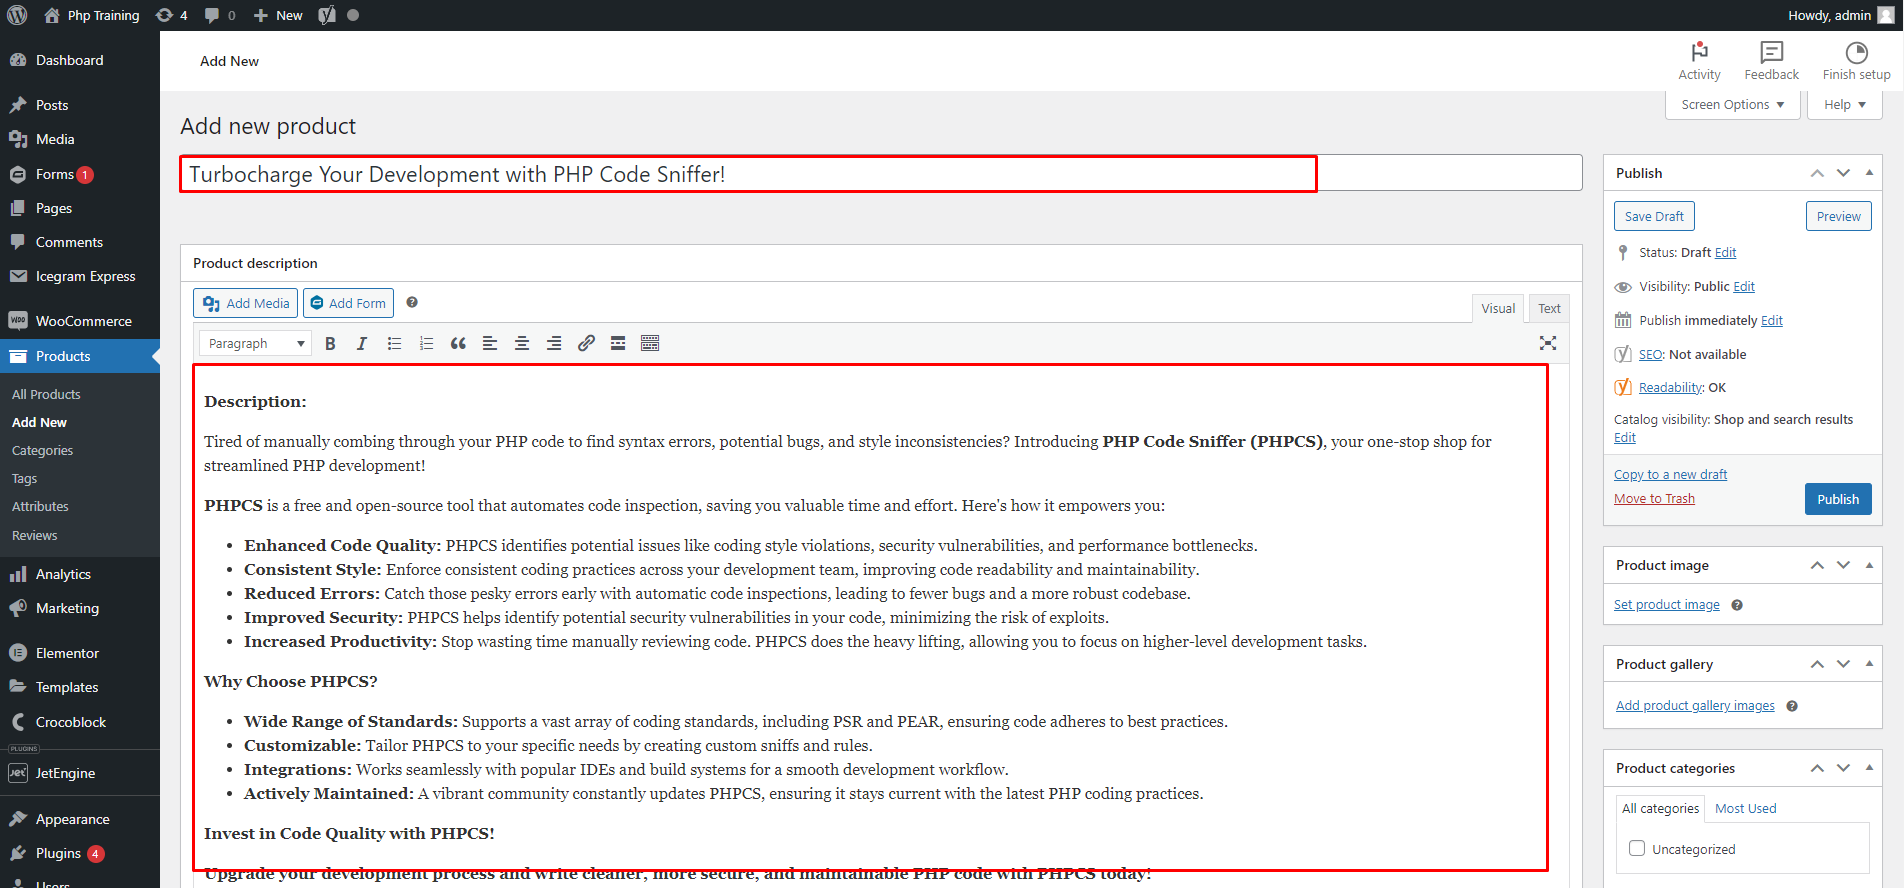
- Enter a clear and descriptive product title.
- Add a detailed product description with high-quality images.
-
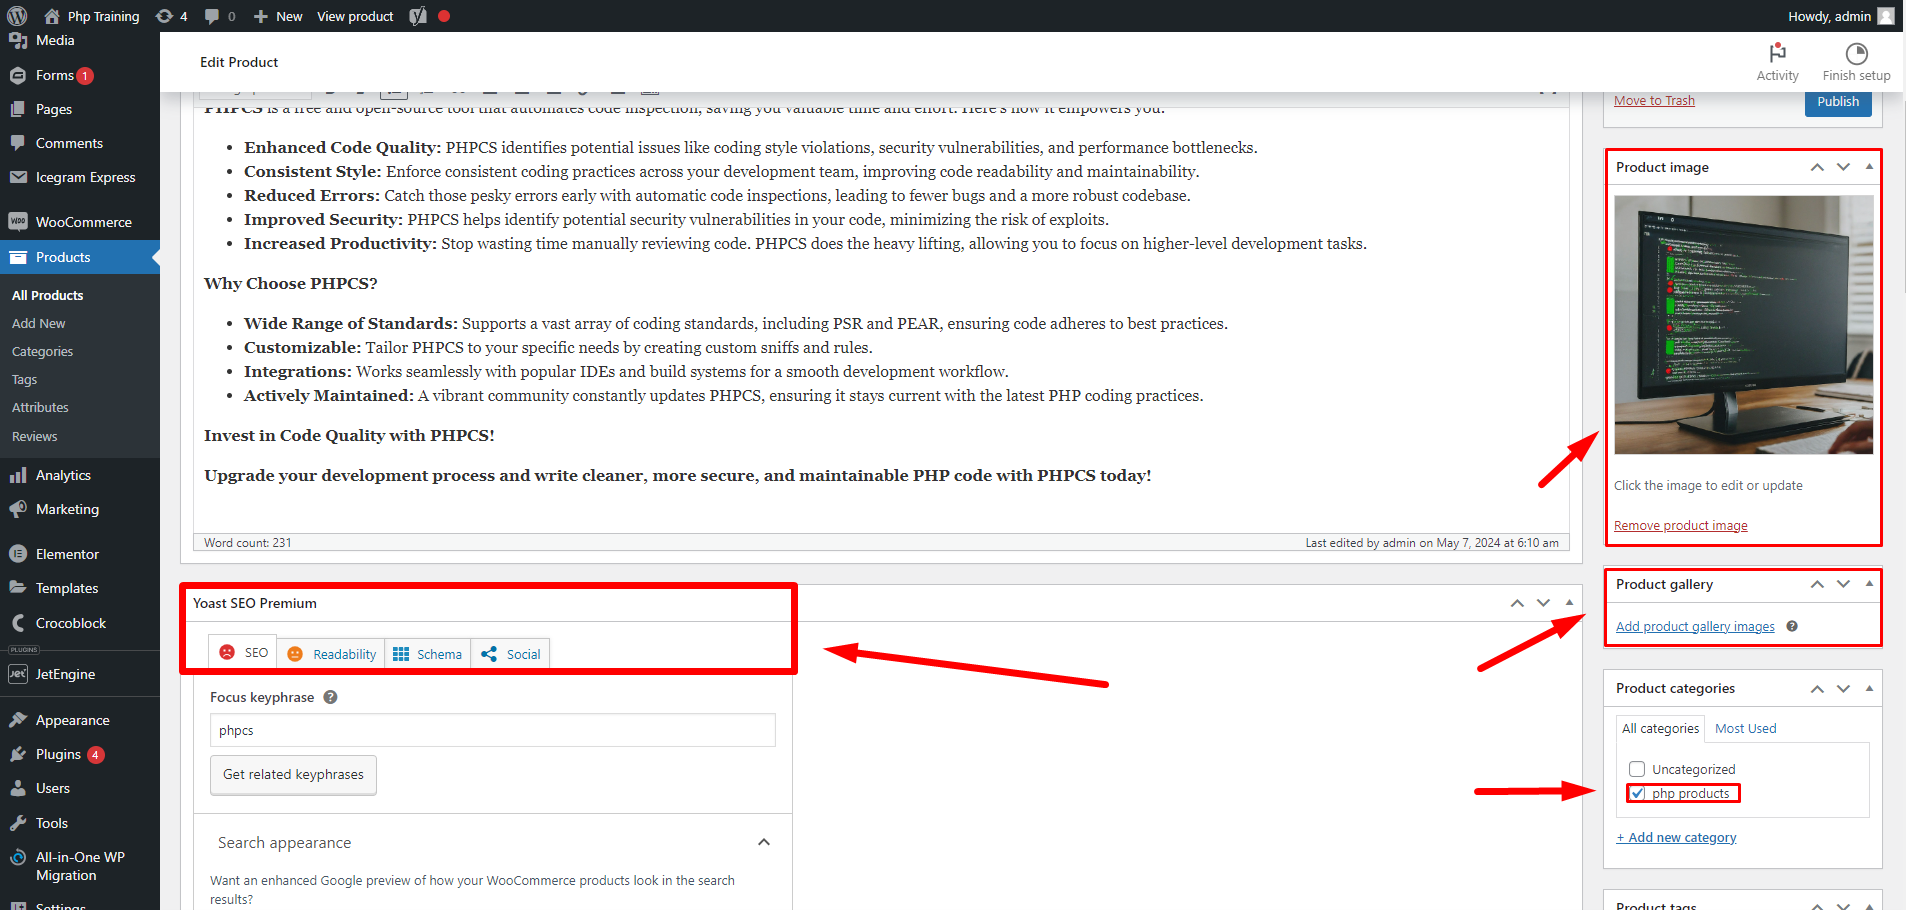
- Fill this with some other things as required to your product.
-
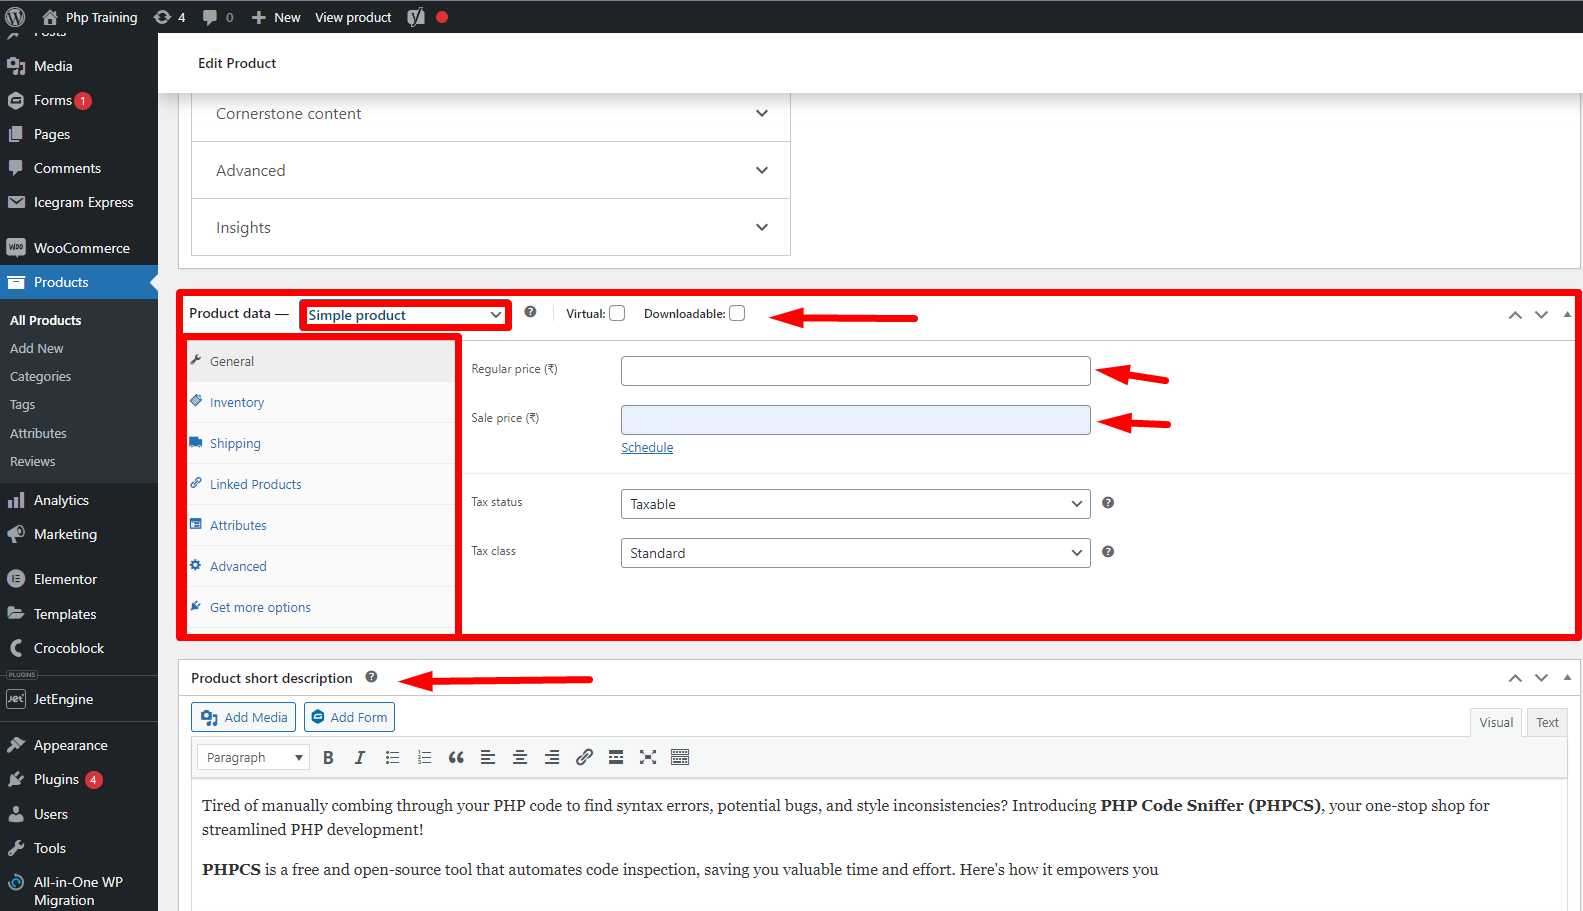
- Set your product pricing, inventory levels, and shipping details.
- Categorize your products for better organization.
- Fill these all steps as required to your product.
 Step 5: Design Your Store
-
-
- WooCommerce offers numerous free and premium themes specifically designed for online stores.
- Choose a theme that aligns with your brand identity and desired functionality.
- Many themes offer customization options to personalize your store's appearance.
-
Congratulations! You've successfully installed and set up WooCommerce. With some additional customization and product population, your online store will be ready to welcome customers.
Bonus Tip: Explore the vast library of free and paid WooCommerce extensions to further enhance your store's functionality. From marketing tools to advanced shipping options, there's an extension for almost every need.
By following these steps, you'll be well on your way to launching a thriving online store with WooCommerce!
Mastering Your Online Store: A Guide to Configuring WooCommerce Settings
WooCommerce offers a robust set of settings to fine-tune your online store and optimize the shopping experience for your customers. Here's a breakdown of key settings sections and what you can configure within each:
-
-
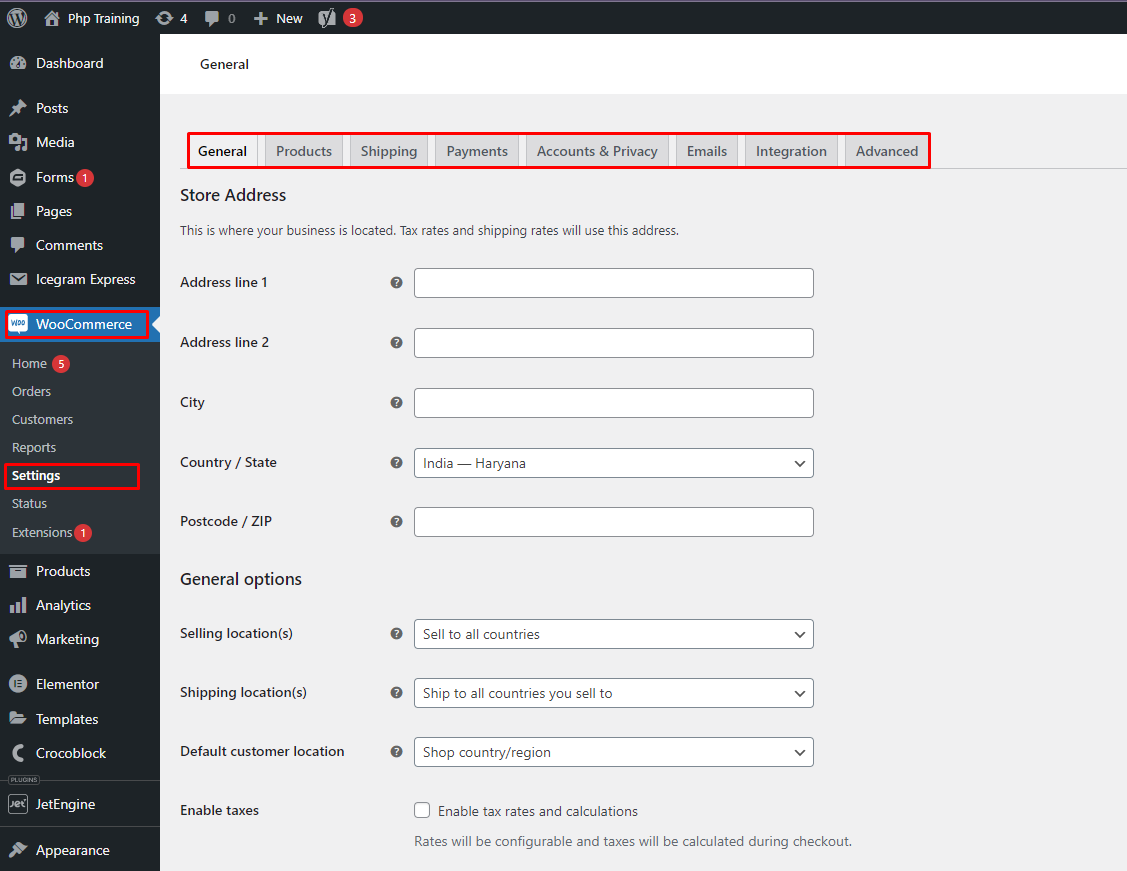
- General Settings:
-
-
-
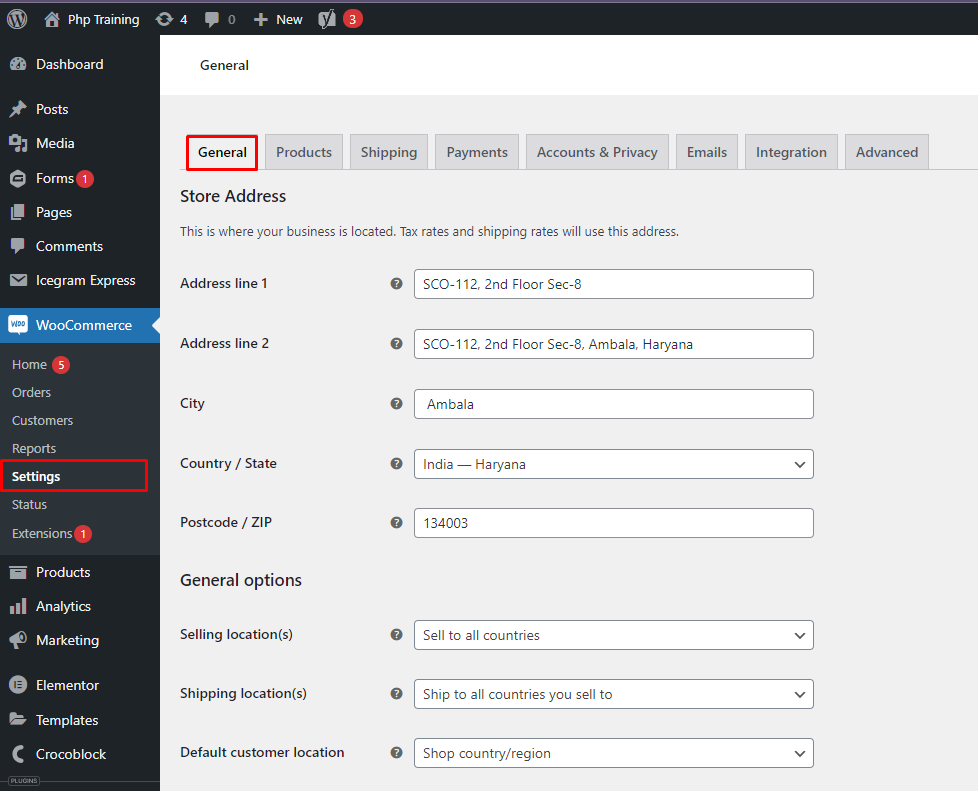
- Store Location: Specify your store address and preferred currency.
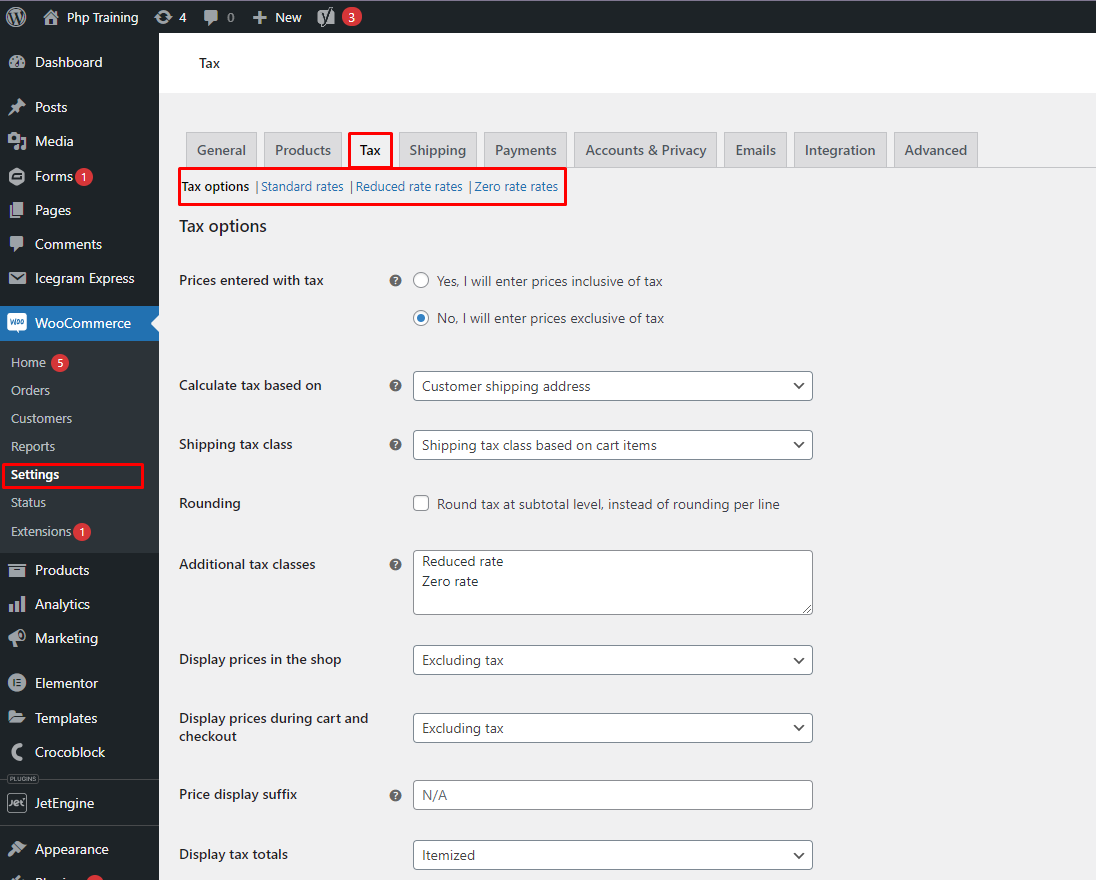
- Taxes: Enable automatic tax calculations based on your location or configure manual rates.
-
-
-
- Shipping: Set up shipping zones and define shipping costs for different regions or product weights. You can also integrate with real-time shipping services.
- Store Notice: Display a site-wide message for announcements like promotions or sales.
- Products: Set default product measurements and weight units. Configure inventory management options (tracking stock, low stock thresholds).
-
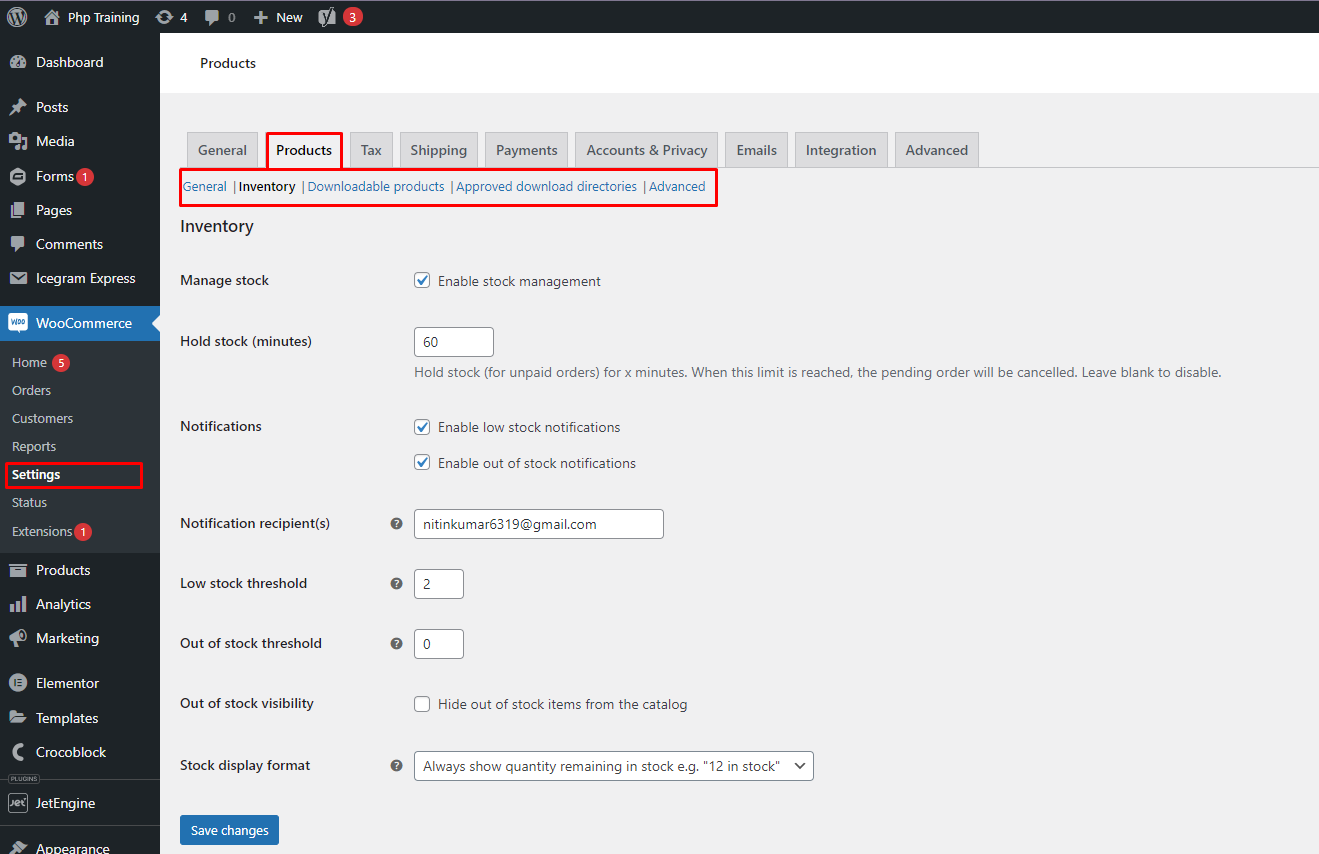
Products Settings:
- General: Customize the number of products displayed per page and choose how related products are displayed.
- Inventory: Enable stock management, set low stock thresholds for notifications, and choose how out-of-stock products are handled (hidden, displayed with messaging).
- Downloads: Choose the download method for downloadable products (direct download, email attachment).
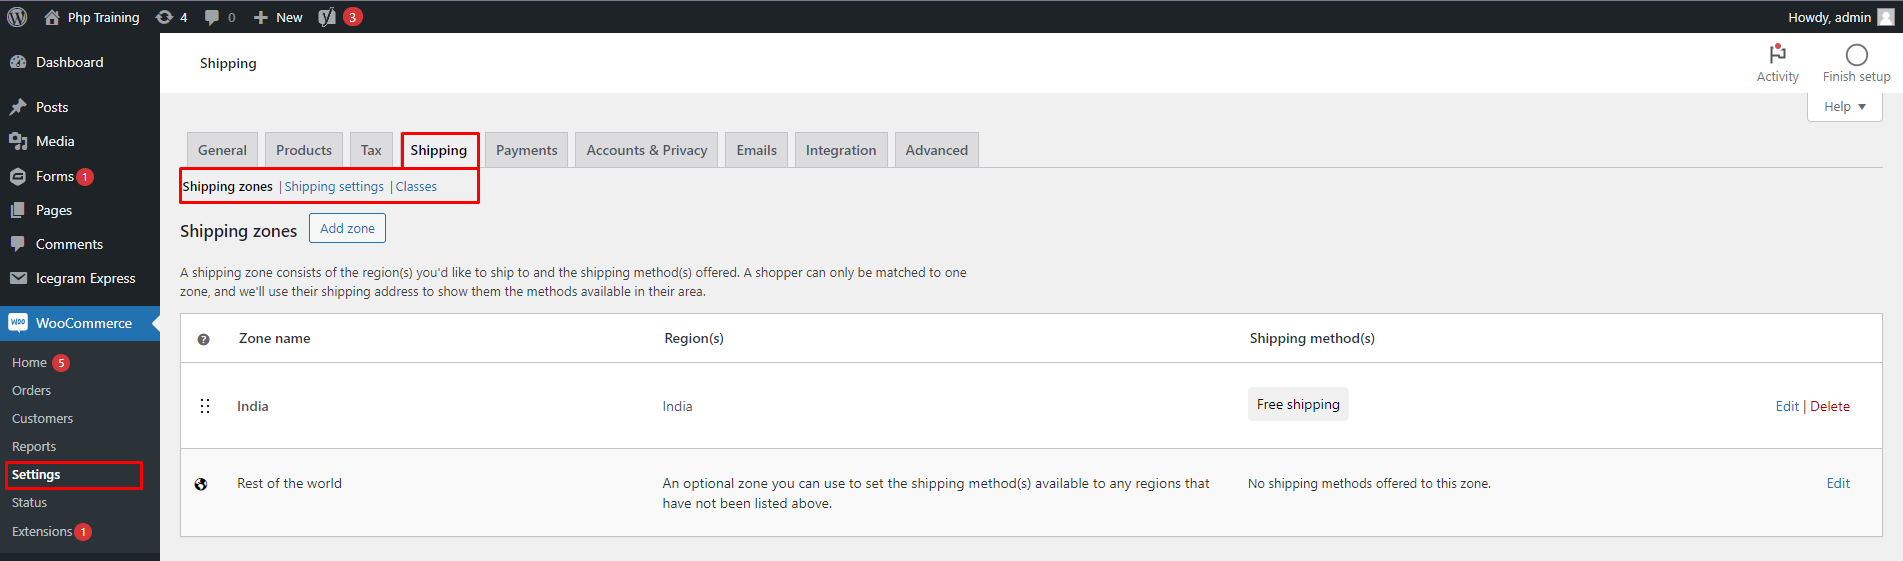
- Shipping Settings:
- Shipping Zones: Define geographical zones for targeted shipping rates.
- Shipping Methods: Configure flat rates, weight-based rates, or integrate with real-time shipping carriers (e.g., USPS, FedEx) for dynamic shipping costs.
- Free Shipping: Set up minimum purchase thresholds for free shipping offers.
- Shipping Options: Customize how shipping costs are displayed at checkout (including taxes).
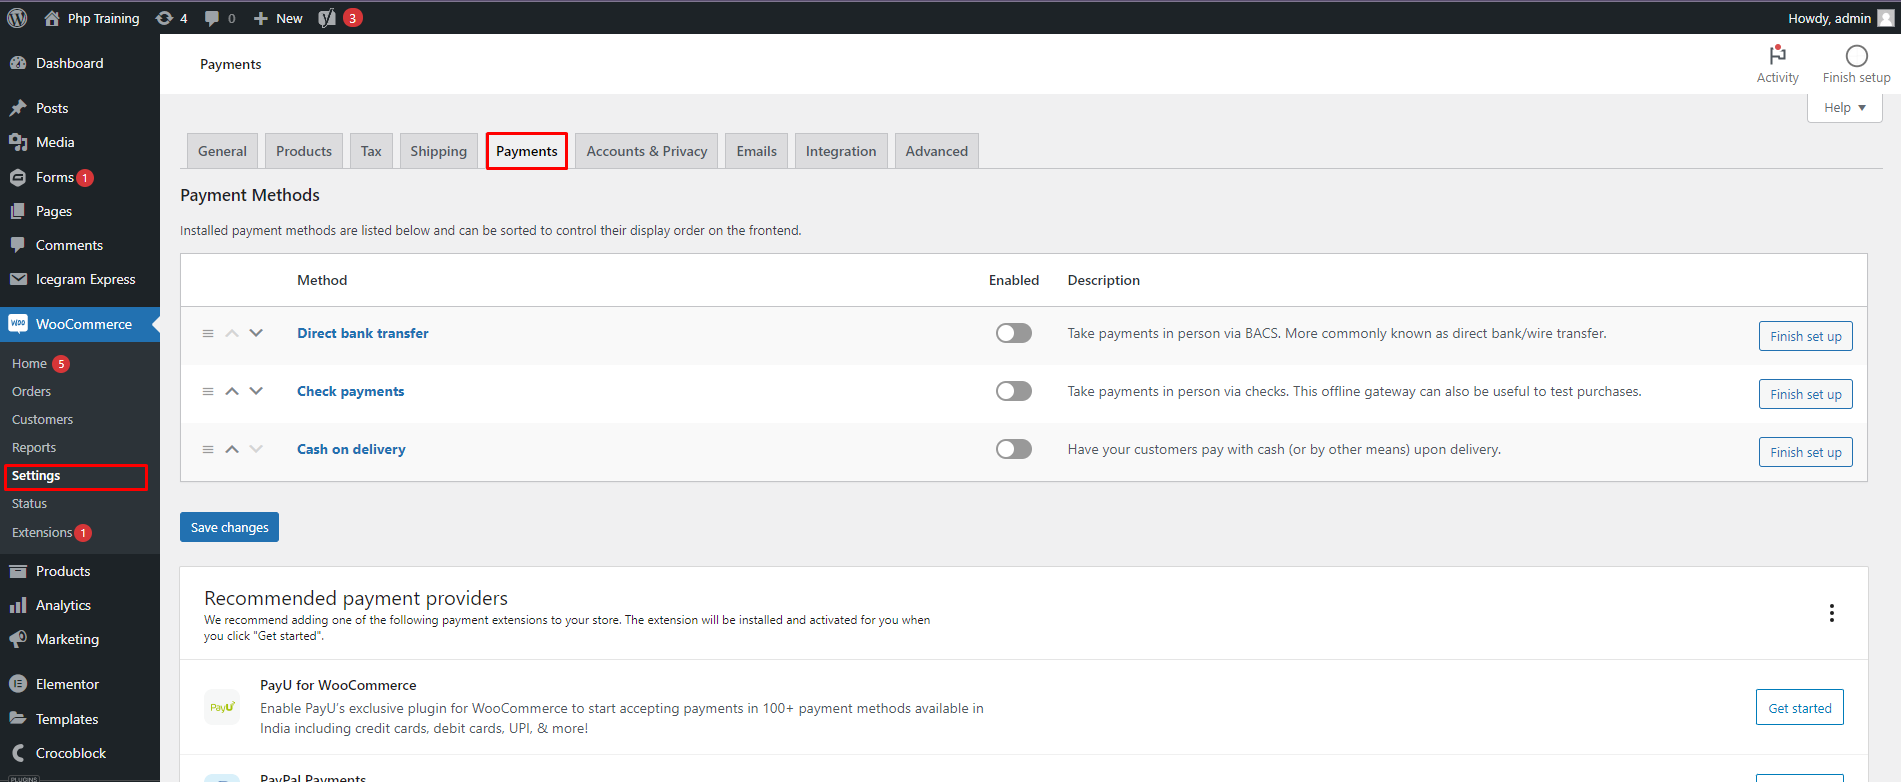
- Payments Settings:
- Enabled Payment Gateways: Choose which payment methods you want to offer (e.g., Stripe, PayPal, Cash on Delivery). Each gateway might have additional settings for API keys or account details.
- Checkout Options: Enable guest checkout (allowing purchases without account creation) and configure order pay buttons.
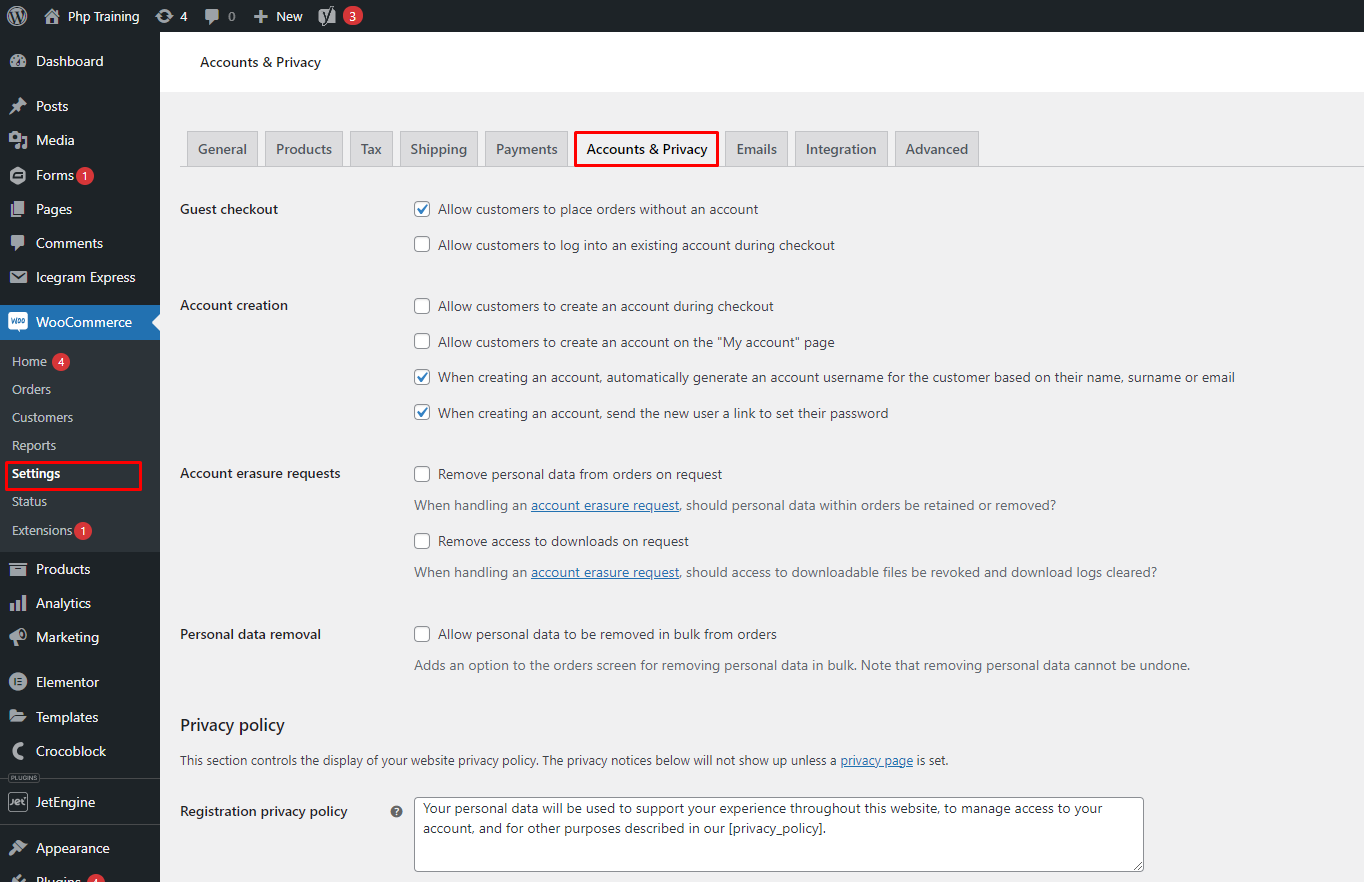
- Accounts Settings:
- Customer Accounts: Decide if you want to allow customer accounts and registration for your store.
- My Account Page: Customize the content displayed on the customer account dashboard (e.g., order history, download links).
- Privacy: Configure privacy settings related to customer data collection and storage.
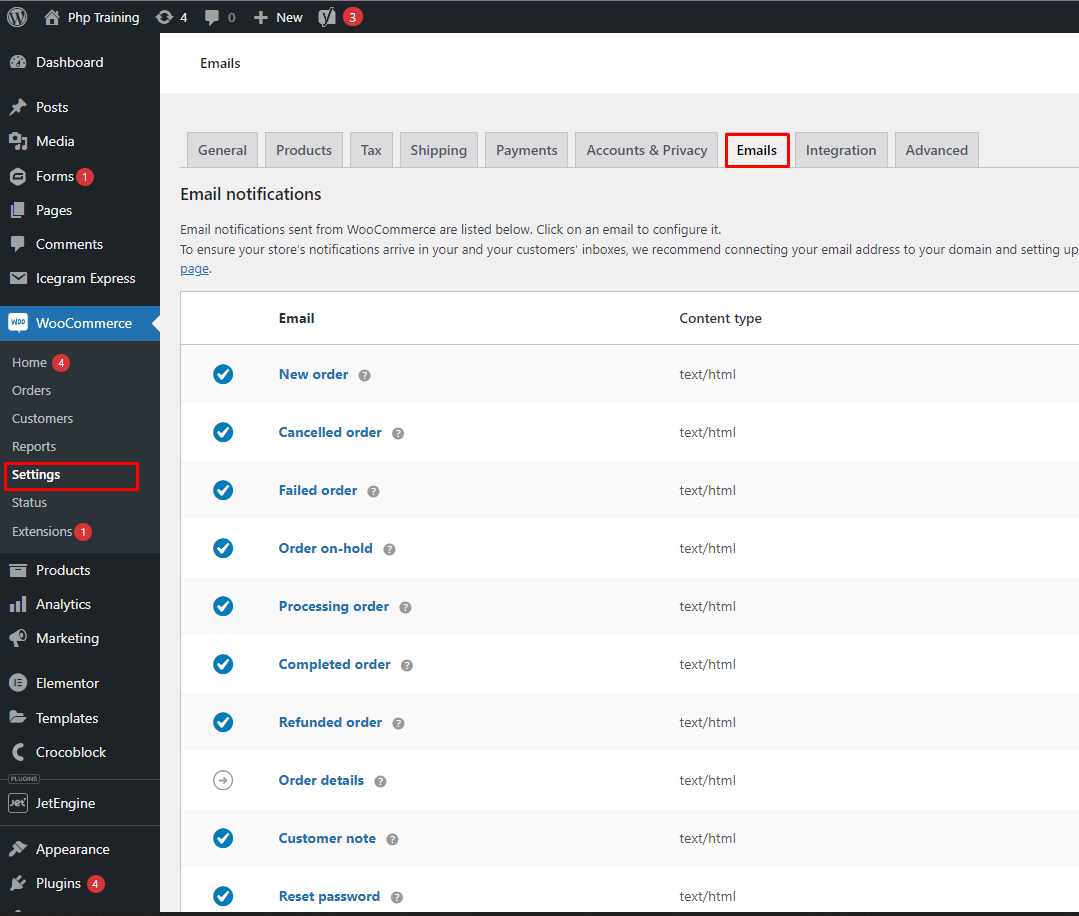
- Emails Settings:
- Email Templates: Customize the content and appearance of automated emails sent to customers (e.g., order confirmation, shipping notifications).
- Email Sender: Set the sender name and email address for your store emails.
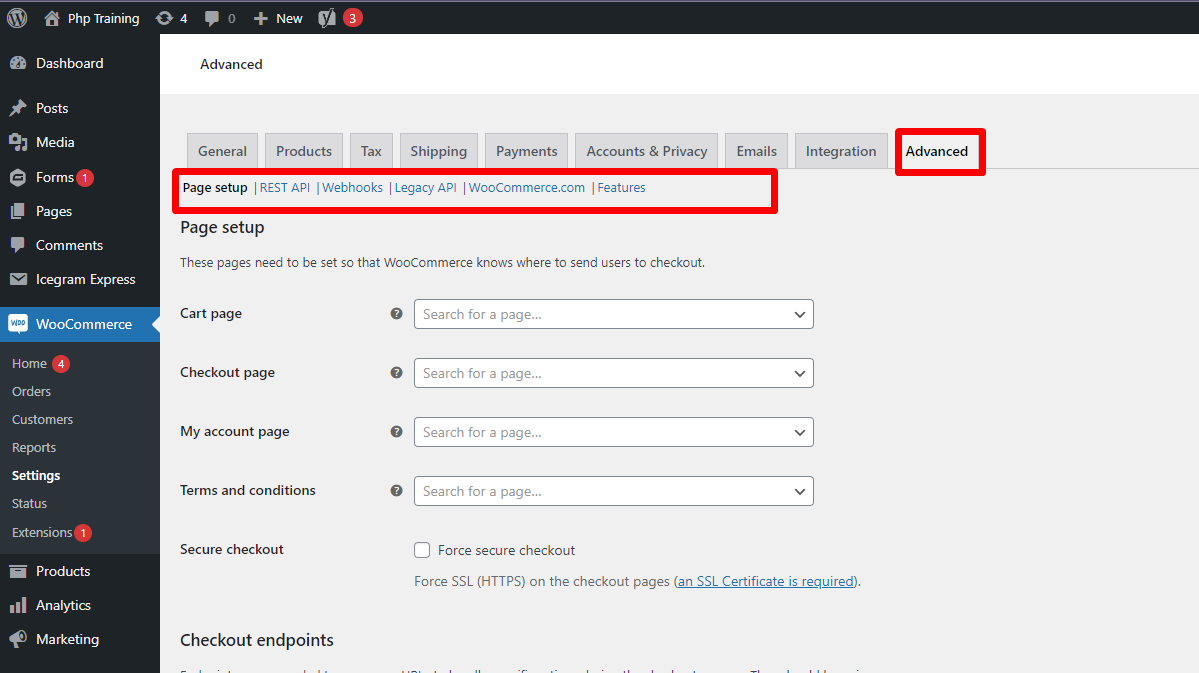
- Advanced Settings:
- API: Manage API access for developers to integrate with your WooCommerce store.
- Webhooks: Configure webhooks to automatically send notifications to third-party services when specific events occur in your store (e.g., new order placed).
Remember:
- Access these settings by navigating to WooCommerce > Settings in your WordPress dashboard.
- Each section offers detailed descriptions and explanations for each setting.
- Carefully consider your business needs and customer preferences when configuring settings.
By strategically configuring these settings, you can create a seamless and user-friendly shopping experience for your customers, ultimately leading to a thriving online store.