Before You Begin:
- Download: Ensure you have downloaded the backup file from your previous website or backup location. It should be a compressed file with a wordpress
- Plugin Installation: Make sure the All-in-One WP Migration plugin is installed and activated on your WordPress website where you want to import the backup.

Steps to Import the Backup:
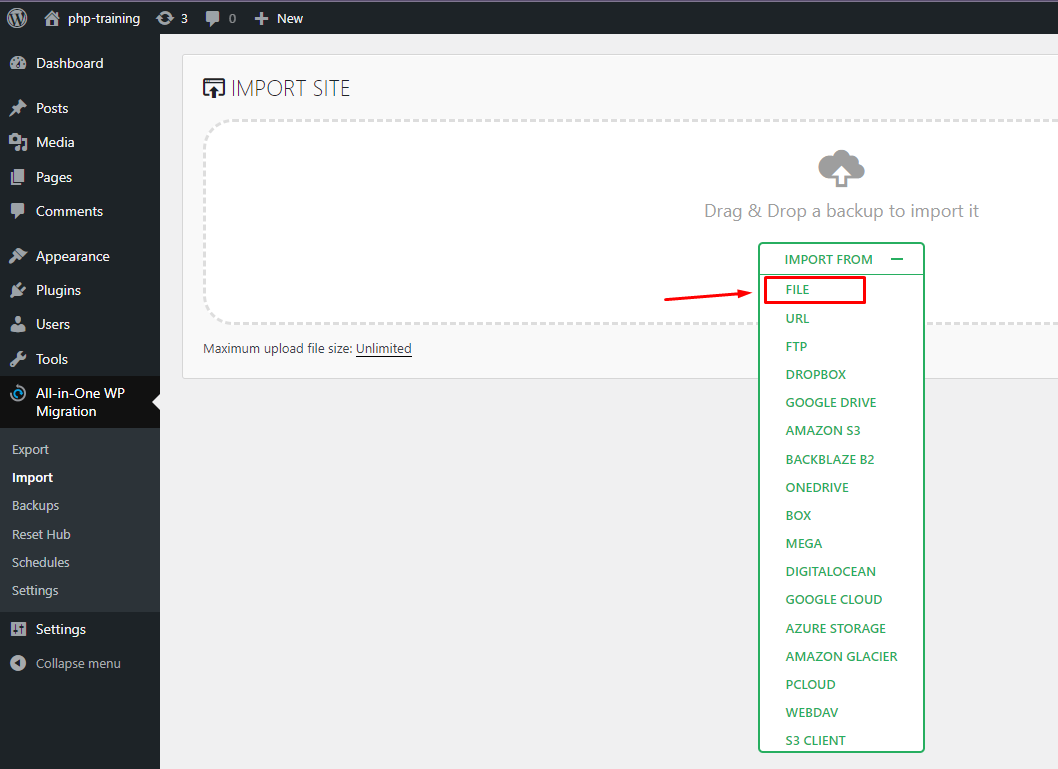
- Navigate to the Plugin: In your WordPress dashboard, go to Plugins > All-in-One WP Migration.
- Import Option: Click on the Import tab.

- Import From: Choose the source of your backup file. Select File from the dropdown menu.

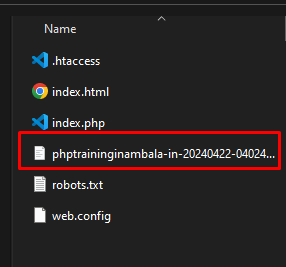
- Select Backup File: Click on Choose File and locate the downloaded backup file (.wpress extension) on your computer. Select it and click Open.
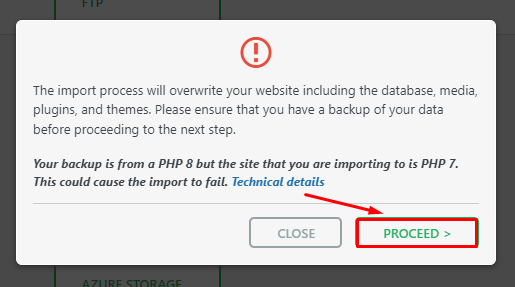
- Import Confirmation: A confirmation message will appear, outlining the potential consequences of the import process. This includes overwriting your existing website data (database, themes, plugins, etc.) with the contents of the backup file.

Important Note: Make sure you have a separate backup of your current website before proceeding, especially if you're not importing into a development environment.
- Proceed with Caution: If you're confident and have a separate backup, click on the Proceed button to initiate the import process.

Note: If you are trying to setup site on localhost you can follow these steps to save time:
7. Move the backup file directly to the localhost wordpress
- Step 1: Open your www folder in WAMP folder.

- Step 2: Open the respective folder.

- Step 3: Select wp-content folder.

- Step 4: Select ai1wm-backups folder.

- Step 5: Paste your downloaded backup here.

- Step 6: Now navigate to backend of localhost php training site. Your backup plugin had a backup now which you added in the wp-content folder.

- Step 7: Now you can Restore your backup simply from the backup file.

- Import Progress: The plugin will display a progress bar indicating the import status. This can take some time depending on the size of your backup file.

-
- Import Success: Once the import is complete, you'll see a success message on the screen.
- Verify the Import: It's highly recommended to log out of your WordPress dashboard and then log back in to ensure everything has been imported correctly. Check your website pages, posts, and other elements to confirm the data has been restored as expected.
Additional Tips:
- File Size Limitations: The free version of the All-in-One WP Migration plugin might have limitations on the size of the backup file you can import. Consider upgrading to the premium version if your backup file exceeds the limit.
- Troubleshooting: If you encounter any errors during the import process, refer to the All-in-One WP Migration plugin documentation or their support channels for assistance.
By following these steps and keeping the notes in mind, you should be able to successfully import your downloaded backup using the All-in-One WP Migration plugin in WordPress.
Post Views: 40


