
Here's a detailed guide on updating WAMP while addressing the missing VC++ issue:
Important Note: Updating WAMP can overwrite existing configurations or lead to compatibility issues with your projects. It's generally advisable to back up your projects and any custom WAMP configurations before proceeding.
1. Backup (Optional but Recommended):
- It's highly recommended to create backups of your projects and any custom WAMP configurations before proceeding.
- Project backups: Copy your project folders from the www directory within your WAMP installation directory (usually C:\wamp64\www).
- Configuration backups: If you've made any modifications to WAMP configuration files, copy those files to a safe location.
2. Download WAMP Update:
- Visit the official WAMP server website:
- WAMP Updates Section: Locate the “WAMP Updates” section on the webpage. This section typically lists the latest available WAMP server versions.
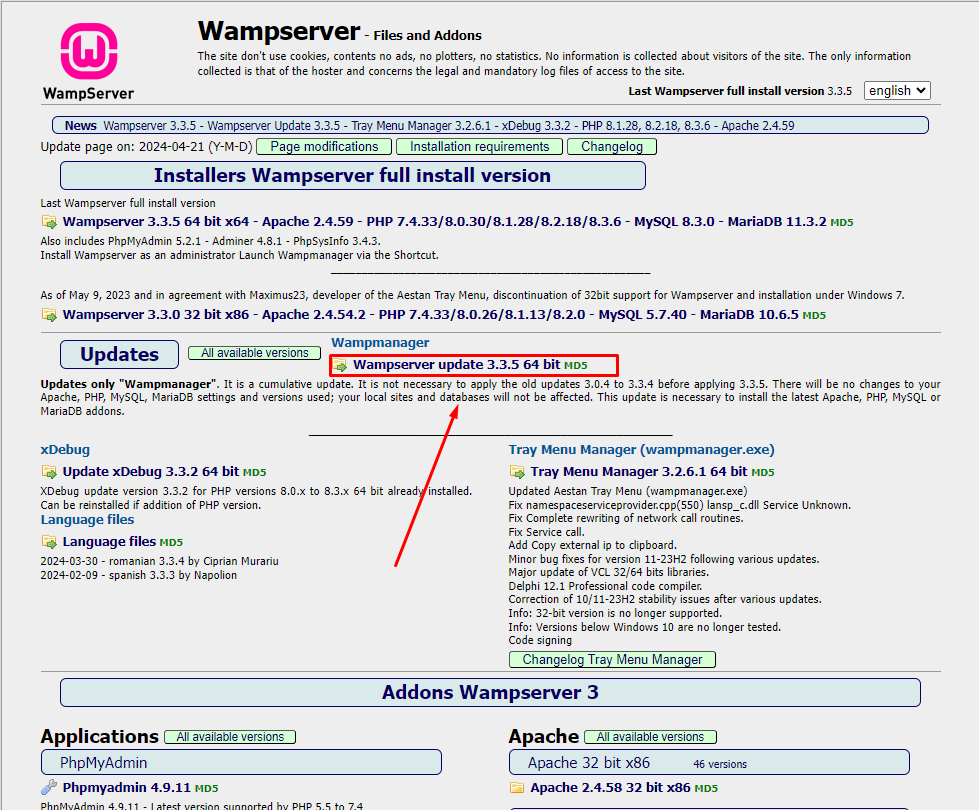
- Download Update: Download the update package that corresponds to your current WAMP version (32-bit or 64-bit). The update will usually be a zip file.
3. Install Required VC++ Redistributable Packages:
- Since you mentioned not having VC++, you'll need to install the necessary packages before proceeding with the update.
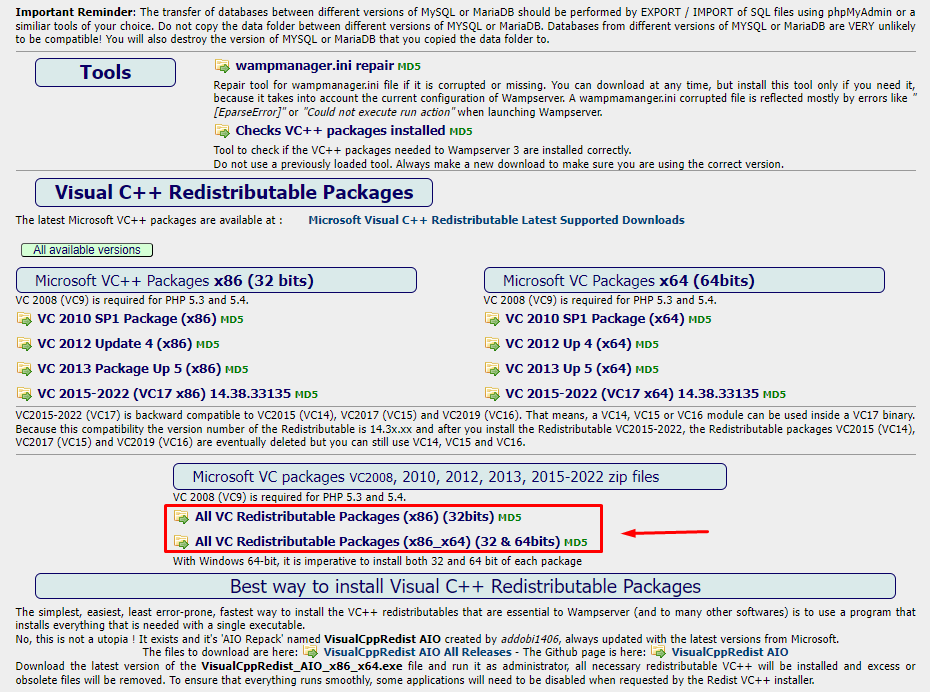
- Download Packages: Visit the Microsoft website:
- For more info about VC++ click here.
- Choose the right versions: Download both the 32-bit (x86) and 64-bit (x64) versions of the “Visual C++ Redistributable Packages for Visual Studio” that are compatible with your system. You can usually find information about your system type (32-bit or 64-bit) in your system settings or documentation.
- Run the Installers: Locate the downloaded VC++ installer files on your computer. Run the folder and install the all instructions to complete the installation.
4. Close WAMP Services (if running):
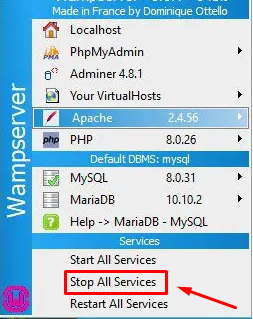
- Ensure all WAMP services (Apache, MySQL) are stopped. You can usually do this by right-clicking on the WAMP server icon in your system tray and selecting “Stop All Services”.
5. Run the WAMP Update Installer:
- Locate the downloaded WAMP update zip file on your computer.
- Right-click on the zip file and choose “Extract All…” from the menu.
- Run the installer program included in the extracted update folder. (The installer filename might vary depending on the update version).
- Follow the on-screen instructions during the update process. It might involve accepting licence agreements and choosing installation options.
6. Start WAMP Services:
- Once the update is complete, right-click on the WAMP server icon in your system tray and select “Start All Services”.
This process should update your entire WAMP server installation.
Additional Tips:
- If you encounter any issues during the update process, you can search online for solutions specific to the error message you see. The WAMP server documentation and online forums can be valuable resources.
- Remember that updating WAMP can introduce compatibility issues with your projects. If you encounter problems after updating, consider reverting to your previous WAMP version using your backups.
By following these steps and addressing the missing VC++ issue, you should be able to update your WAMP server successfully.